Wednesday, April 26, 2017

Greek Soup (Avgolemono)


A perfect spring soup. Rich and creamy it will warm you up but is light with lemon in it. I went to a Greek restaurant a couple months ago and they served this soup. It was the perfect way to start my meal and with the warmer temperatures I wanted replicate this at home. It was easy to do  in the crockpot and I doubled my recipe.

What you need~
2 pounds of chicken thighs (boneless)
2 celery stocks cleaned and chopped
1 yellow onion (diced)
3 cloves of garlic (minced)
8 cups of chicken broth
4 cups of water
1 cup of lemon juice
Nature's seasoning to taste
lemon pepper seasoning to taste
1 cup of rice (Jasmine)
4 eggs
Feta cheese


Start by prepping all your veggies and placing in the crockpot with the chicken. Season with your seasonings and add the lemon juice, water and stock. Let this cook on low for 5-8 hours. An hour before you eat shred the chicken and add your rice. Turn the crockpot on high for this last hour to cook the rice. Right before serving put your 4 eggs in a bowl. Slowly add some of the soup broth to the eggs whisking the whole time. When the eggs are cooked and same temperature of the soup add to the soup. You do this to add creaminess to the soup and avoid scrambled eggs. Top your soup with feta cheese while serving.


I will admit it is not a pretty looking soup but it is flavorful and tasty. I will make this again really soon.

Until next time~
XoXo Emily

Thursday, April 20, 2017

Gel Nails


Okay. I have to admit I am proud of myself.  For about a year now I have been debating starting to do my own gel nails. When you go get a fancy manicure for a wedding and such many people opt for a gel mani as it lasts for up to two weeks. Gel is different than normal nail polish as it has to be cured. It requires a special lamp to do this. I will admit that it was intimidating while researching how to do this at home. I did a ton of research on it and then started figuring out if I wanted to do a starter kit or just buy random products and start painting away. I bought a kit. It took me numerous manicures and I now feel comfortable enough to share my process for how I do my nails as well as some friendly tips to help you too.

What you need~
nail buffer
nail file
pure acetone
paper towel or lint free wipes
rubbing alcohol or gel cleanser
gel primer
base coat
color gel polish
top coat
LED lamp

Start by making sure all your nails are filed/trimmed to your liking and are clean. If unsure wipe with rubbing alcohol. I prefer to leave my nails a little longer so I have a lip on them to apply each layer under the nail a bit as well. I will explain why this is important later.  Buff each nail lightly to remove any excuse oils.
Curing in the LED lamp.

At this time you want to prime your nails by applying a thin layer of the gel primer to each nail and
let this dry completely. I usually allow this to dry for about 2 minutes.

Start with your base coat. I found that I cannot fit my whole hand under my LED light. Therefore I always do both thumbs first. Apply a thin layer of base coat to your thumbs. Do not get on your cuticles at ALL. This is important so that the polish will adhere cleanly to your nail and not pull up on the sides or peel. Cap the polish on the tips and slightly under your nail as well to prevent chipping. Cure the thumbs under your lamp for 30 seconds. My lamp has two time settings 30 and 60 seconds. If yours does not then use your phone as a timer. Your nails will be tacky that is normal at this time.  Apply the base coat to the rest of your nails with the same steps above.

Apply three layers of color to your nails using the same steps above careful to not get any on your skin and cap each tip of your nail and the underside of that nail. Remember thin layers are your friend here.

Apply two layers of top coat. When I apply the top coat I let them cure for a full 60 seconds each time.

At this time your nails will still be tacky or sticky. Using your paper towel or lint free wipes if you are fancy apply rubbing alcohol or gel cleanser (if fancy) to your nails. It is okay to rub the nails at this time as they are cured and dry. Once each nail is no longer sticky go do whatever the heck you want. I went and washed dishes last time I was done.

To remove the gel follow these steps!
DO not chip or pick at the polish it will remove part of your nail bed with it. Please follow the steps listed in the post above. I have got it down to removal in about a half hour now.

EMERGENCY fixes. Sometimes you get paint on your cuticle and you have it pulling up in the corner. It may happen or even a chip can occur. That is okay. Buff off the top coat and apply a "full" service to the spot that needs the attention. Do a full manicure to the section of your nail that chipped. Since it is only one nail and most likely a small spot it will only take a couple minutes to do.

Tip: You can also add another layer of top coat to your tips a week into wear to make them last longer since that is where most of our wear comes from.


I really love the wear I can get out of a manicure now. The longest I have worn a manicure has been about 10 days and I removed the polish due to being bored with the color mostly. I am always grumpy by out growth as well. I hope this helps you see that you too can do your own nails at home and have the salon quality you want. If only you are a little brave and patient.

Until next time~
XoXo Emily


Monday, April 17, 2017

Banana Pudding


Decadent and oh so creamy. I made this for Easter and I am secretly happy there are leftovers. My allergies are raging and this is the perfect dessert to eat when you need something soul warming. I used Paula Dean's recipe the only alteration I did was swap out the type of cookies because I could not find "chessman cookies" to save my life. So I went ahead and used vanilla wafers for this pudding. I actually like the buttery flavor of the wafers with the creamy pudding. I also recommend you try to use almost over ripe banana's for this as they will be sweet and break down in the pudding better.

What you need~
6-8 banana's
1 box of vanilla wafer cookies
1 can evaporated milk
2 (3.5 ounce) boxes of French vanilla instant pudding mix
2 cups milk
1 container of whipping cream (Thawed)
1 (8 ounce) package of cream cheese (softened)


Start by layering half the box of cookies in the bottom of a 9x13 pan. Cover with sliced banana's. In a small bowl use a handheld mixer to whisk together the milk and instant pudding. In a separate bowl whisk together the evaporated milk and cream cheese. Fold the whipping cream into the second bowl that has the milk/cream cheese mixture. Then add the two bowls together mixing lightly. Pour this mixture over the  banana's and cookies in the pan. Top with the remaining cookies. Chill for at least over night before eating.


I really liked this a lot and I will for sure be making it again as it is really easy to do. If you are good and dumping stuff in bowls you can totally make this. People will be happy with it too as it is really tasty.
 
Until next time~
XoXo Emily


Tuesday, April 11, 2017

Iced Chai Tea


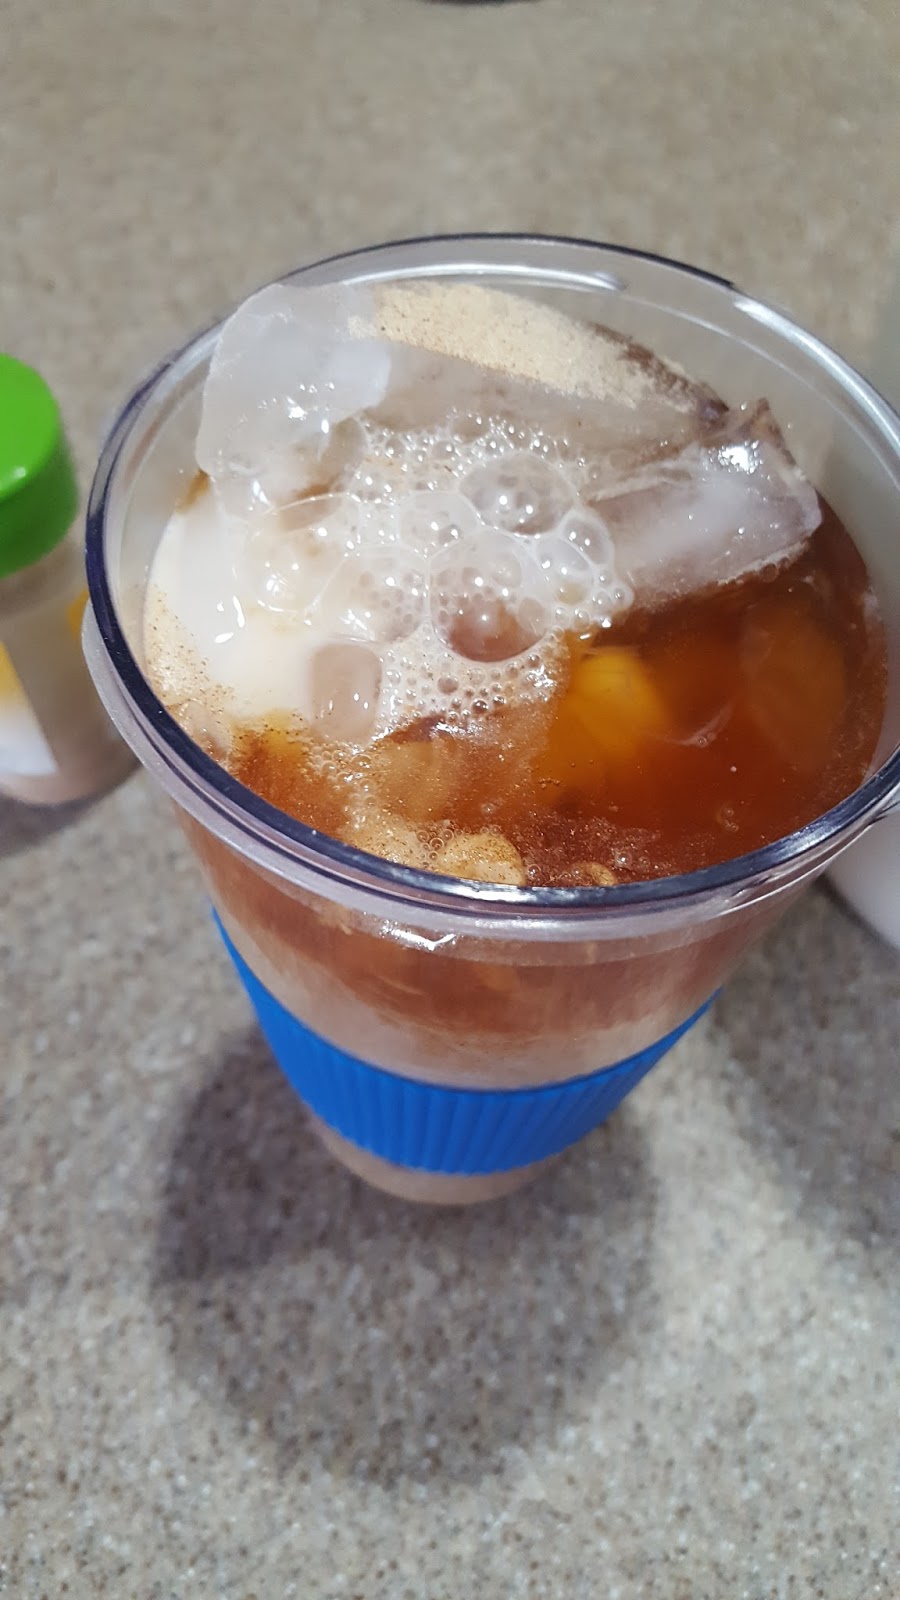
Cheap, creamy and oh so easy to make. I have no idea why people pay $5 for this when I made an entire weeks work for about $3 if you include the price of the milk. I stopped at the local coffee place to buy myself an iced chai and when I saw the cost I almost passed out. $5 for some cold tea. I knew I could do this myself. I did not know it would be so cost effective and actually really tasty. Plus using almond milk I cut the calories to about 60 calories compared to (insert large name coffee shop) that packs 300 plus calories. I promise you will be making this once a week for yourself especially when it warms up and you need a cool beverage. I drink chai year round but cool in the summer on ice is the way to go.


What you need~
12 cups of water
12 tea bags of chai tea
milk
vanilla extract
cinnamon sugar


Start by boiling your 12 cups of water. I have a tea pot I use all the time. If you do not have a tea pot you can boil in a stock pot as needed. Prep your pitcher by placing the tea bags in the pitcher. Remove the paper from the tea bags as you do this. Once the water is boiling away pour over the tea bags. This needs to sit now for 30 minutes. The perfect amount of time to go take a bath and relax. Once the tea has steeped for 30 minutes remove tea bags and place pitcher in the fridge. Let cool before serving.


How I serve my tea is a personal taste. You can drink it straight up black but I like mine creamy. I add a splash of vanilla extract and cinnamon sugar to a bottom of a glass. I then add ice to the glass. I pour the tea in until 3/4 full. Top off with almond milk or any milk of your choosing. Mix and enjoy!


It is so easy to make. I made a giant pitcher of this on Saturday and still have half of it left after drinking 4 glasses out of it so far.

Until next time~
XoXo Emily

Wednesday, April 5, 2017

Healthy Pad Thai


This was soooooo good. I saw pad thai on a tv show the other day and knew I had to make some at home for dinner one night. I looked in the pantry and used what I had on hand to make my own version. It turned out excellent and we had yummy leftovers for a couple meals. If you do not have a giant spaghetti squash like I did make two.

What you need~

Dish:
1 large spaghetti squash (roasted)                            
6 sausages (I had spicy chicken)
Half a red cabbage (diced)
Green pepper (sliced into long strips)
1/4 cup of diced green onions
2 cloves of garlic
1/4 cup of peanuts
2 tablespoons of cilantro
Everglades seasoning

Sauce:
2 tablespoons brown sugar
3 tablespoons soy sauce
1/8 teaspoon of sriracha
2 tablespoons lime juice
2 teaspoons olive oil


I roasted my squash at 350 degrees for an hour because it was so big. I then removed it from the skin and placed in a bowl to rest while I made the rest of the dish. I chopped up the cabbage and green peppers and let that sweat down on medium heat.  Season this well with the Everglades seasoning. Make sure you season each time you add anything to the pan.  I put my cast iron on medium and heated up the sausages. Cut them up into bite size pieces. When that was almost done I added the garlic for about 2-3 minutes. At this time I prepared the sauce by whisking all the items together. Add the squash to the pan with the cilantro, green onions, sausage and peanuts. Then it is time to eat!

It really is packed with flavor and because it is healthy you could eat a lot of it.


Try it out you will not regret it.

Until next time~
XoXo Emily

Friday, March 31, 2017

Bathroom Renovation: Part 1


It has begun!

Each year we try to take on a home project. Last year we painted the entire outside of the house and the year before that we replaced our heater/ac units. This year we decided to tackle the bathrooms. Starting with our master. My master bathroom is aged. The wood is peeling and the tub was about 14 inches deep and brown. The tile was bowing strangely and the MOLD!

To address these issues we decided to figure out what we could tackle on our own and then hire professionals for the rest.  We decided the moldy tub was something outside out our abilities and would be way to time consuming to do on our own. More on the rest of the bathroom today is about the tub and tub surround.

Yes that is pink tile.
This is what it looked like before.
Pink tile with a lovely black boarder.


This tub was shallow. Only 14 inches deep.


 When you are picking out what to do with your tub there are many options. You can go with a cover which goes over what you have already and "hids" the old. This was not a good option for us due to the mold issue and look wise we did not like the plastic look.  You can re-glaze your tub which to me was scary as my pets and I would have to leave for a long time. Plus that does not address the tiny tub or mold. That left us with the option of a complete removal and replacement. We liked the materials that Tundraland offered. In hindsight they are way too expensive. I will walk you thru what was done though so you can understand what they do as well as some pro's and con's.

They showed up at 7:30am sharp to start the project. They removed the tub and tile as well as the old hardware. The tub area was stripped to the studs.

Fun story: Ryan was working from home the whole time and said that they were pounding on the wall so hard that my giant wooden butterfly in the kitchen fell off the wall.

In progress.
After stripping the old and removing it all they put in marine board pictured below in green. Inserted the tub and the surround with new fixtures. They were done by lunch time. It now needs to dry till tomorrow morning.

PRO's:
They were quick and professional the whole time.
All removal of debris was taken care of by them leaving very little mess in my house.
The product is good quality and is beautiful to look at.
The master plumber found an illegal plumbing issue and was able to fix it for us. When the drop ceiling was put in our basement they put together incorrect plumbing for the tub area. This was fixed with correct plumbing put in.

CON's:
Extremely expensive. I am usually really good at comparing prices and getting a good deal. We had a miscommunication with the sales guy and got locked into a contract. Ryan did a good job talking them down in price but it was still more than we would have liked to end up spending.
Lack of communication. They need to assign a person to you that sticks with you through the whole process much like a contractor would. We changed what we wanted throughout the process and it was hard to get them to really confirm they understood what we now wanted. I was concerned I was going to come home and the wrong bathroom worked on at one point. This also caused issues it scheduling a day for the project. Ryan ended up calling them after not hearing from them and they were like "oh sure when would you like us to come and do it?"

The final project is breath-taking gorgeous though. The surround is my favorite part by far. I also am excited that Ryan will be able to hopefully take baths in the super deep tub.

This tub is 20 inches deep.

Love the color of the surround.

We had two shelves and a pull bar added.

Side by side comparison.
 Ryan and I have a big job the next couple weeks picking out flooring and everything else in the bathroom. The end project should be lovely.

Until next time~
XoXo Emily


Wednesday, March 29, 2017

Travel Adventures: Millwaukee/The Lumineers Concert


What an adventure! Sometimes in life things fall into place in such a perfect way that you really could not have planned them better. As many of you know Ryan and I do a lot of random last minute traveling. It brings us joy and being able to bring others along just adds to the happiness.

This adventure starts with a dear friend having to sell her tickets to The Lumineers. I love this band I did not buy tickets this time around because I had seen them last year. Ryan and I like to continuously try new bands so it can get crazy if you try to throw to much in the mix. Our friend Ashley was kind enough to offer her tickets to us to buy due to not being able to go. Originally I could not find anyone to go with us. Last minute my mom and dad agreed to go with. We packed up the car and were on our way!  As many people know my father has cancer and it is nice to be able to get him out enjoying life and spending time together.


First stop was the original Water Street Brewery . This was the perfect place to take my family the menu was vast so everyone could get something to their liking. The also have their beers on tap and such which always makes the craft beer lover in me happy.


We then had a little more time to kill after parking the car. That was interesting as the ramp we usually park in was tore down for the new Buck's stadium. We always know we can count on Mader's  for a good German beer. This is as classic as it gets when it comes to German bars. The service was a little slow and we quickly realized that it is because the restaurant was packed almost overflowing with people. I went to the bathroom and walked past like 100 people in all their service rooms they have.

After killing some time at Mader's it was time to go to the concert. I really liked seeing The Lumineers outside and I was hoping inside they would be even better. They killed it. Back to that in a bit first I have to tell the tale of the missing donuts. When your on a trip with your family you want to make sure everyone is happy. My dad loves mini donuts and if he could have them every day I bet he would. We could smell them and saw a sign advertising them at two locations. One on floor 200 and one on floor 400. NADA.... Not there! We were stumped and thought maybe they were not serving them at all our noses lied to us. Until my mom saw a lady with some. I sprinted after this stranger as fast as my body would let me to ask her where she got them. "Oh on floor 300" she tells me. Once again this was not true nothing on that floor. The suites are on that floor and the lady working there directed us back to floor 200 near 204 she says. Becoming rather annoyed we almost gave up when we got to 204 and there were no donuts in sight. Lucky for us my tall husband spotted the stand!
Mini donuts in hand we made it back to our seats as the first opener started.

The first opening band was pretty good Susto.  I liked their up tempo beats and vocals a lot.
The second opener was Kaleo. I really only liked half of their set. Their music has a strange off beat to it sometimes and I am not a fan of the lead singers voice on some of the songs. He tries to sing high sometimes and his range does not really allow that. I liked the blues tracks more than the other songs they sang.


The Lumineers. They are special. Most of their songs are under 5 minutes. I like to call their music short and sweet. Their song pacing is perfection it is almost like a dance class. They build you up with fast manic pace and then cool down for a bit. The lead singer shared some personal stories about his father dying of cancer and some of the songs he sang were about that. I found that touching to be standing next to my own father who is battling the disease. They roam the stage, they run through the crowd and they even pay some songs in the crowd on a smaller stage.  It was a great show and even my parents really enjoyed themselves.


I find that the older you get the less time you have with the ones you love. If you can have nights like this where you go on a random adventure I would recommend it. What's the worst that can happen you eat too many donuts?


Until next time~
XoXo Emily