Monday, August 7, 2017

Breakfast Burritos


Who does not love a nice warm burrito? Ryan has always loved breakfast burritos and I thought I would prep some for him to have all this week. These freeze well if you make too big of a batch. He tried one this morning and told me he really liked them. Although he wants more eggs for the next batch. If you prep everything you can really make a big batch. This time I made about 9 burritos. We froze 4 of them for next week.

What you need~
7 eggs (we are doing more next time)
2 large chorizo sausage
1 Onion
2 Potatoes
1.4 cup Pesto (any sauce you wish salsa works well)
1 cup of cheese
9 Burrito wrappers


Cook all of the above ingredients. I chopped the potatoes and then boiled them till done. Browned the onion, sausage and added the cooked potato. Remove this and let it cool in a bowl. Cook your scrambled eggs. My eggs are always seasoned and then we add a little milk to make them creamy while cooking. Remove from heat and mix with the bowl. Time to make the burritos!


Start by warming the burrito wrapper so it is easier to fold. Put about 1 teaspoon of your sauce on the burrito wrapper. You want to put your filling closer to the edge of one of the sides. Once you do this top with your filling mixture than a small amount of cheese. Roll the burrito as indicated in the images below. Those are not my hands. Ha. Ha. You can freeze or eat each day. I like to wrap mine in foil.


I literally memorized these steps and they worked great.


YUM!

These save you a ton of money if you make them yourself. I would estimate I spent $10 and at the store these cost at least $3 a piece. Try making them sometime.
 
Until next time~
XoXo Emily 


Wednesday, August 2, 2017

Creamy Tartar Sauce


This was a game changer for me. I always buy a bottle of tarter sauce and most of it goes bad because I do not eat it a lot and only with fish really. Therefore when I found myself with a lot of left overs from Friday fish fry I had no idea what to do. I did not want to go to the store and buy a bottle so I researched how to make tarter sauce myself. It is easy and almost embarrassing that I bought it for so many years. I like the idea of making it yourself too because you control the overall flavor by how much you add of each ingredient.

What you need~
Mayo--- I used olive oil mayo I had. About 1/2 cup.
Relish-- I used dill.
Mustard
Lemon juice
Salt & Pepper


I am only giving you measurements for the mayo because everything else I slowly added till I got to the flavor profile I wanted. Add a little of this or that till you get it to your taste. I used a whisk to mix my tarter sauce. It fluffed it up a bit. Pair it with re-heated fish (350 degrees for 10 minutes in the oven) and you have a solid meal.


Add a little at a time of each item.
Mix really well.


YUM!


Until next time~
XoXo Emily

Thursday, July 27, 2017

Kale Pesto


Yummy. I know that you can make pesto out of other things outside of basil. I have known this for a while but never tried it. My mom planted two kale plants for me this year in her garden and they are out of control. A girl can only eat kale so many ways. I have done kale chips, salads and had it in soup. This recipe seemed to good to be true. I was skeptical at best that this was turn out. I was blown away how good it is. If you have a ton of kale try this out it was really good with rice and a spread on sandwiches.

What you need~   
4 cups chopped kale
1 lemon (juiced)
1 clove garlic
1/3 cup olive oil
1/4 cup walnuts
1/3 cup parmesan cheese
Salt & pepper to taste

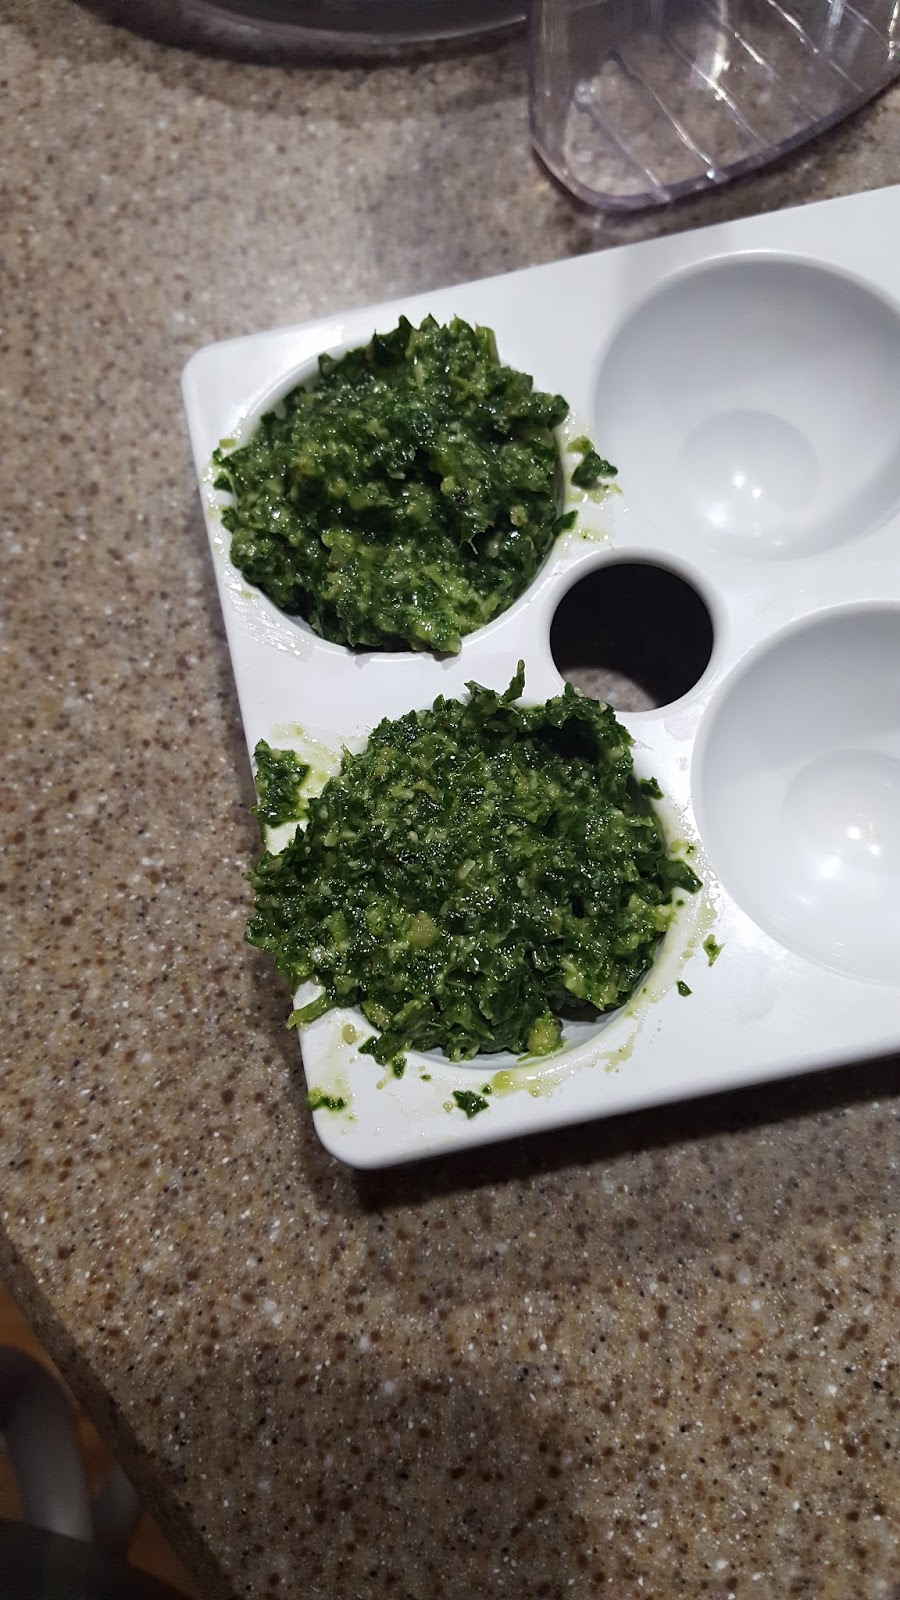
Put all your ingredients in a blender or food processor besides the olive oil. As you blend slowly add the olive oil to the mix. Eat on everything. It goes well on pasta, rice, sandwiches etc. If you want you an freeze it as well for later use. I have images below showing how I did that with ice cube tray. Summer is awesome for produce get out there and use it all up!

All set to mix.

Well blended.

Can put in ice cube trays to freeze for later use. Then place in a freezer Ziploc bag once frozen.

Mmmm..

Ready for use. I used it for cauliflower rice last night. Yum!


Until next time~
XoXo Emily

Monday, July 24, 2017

Chocolate Chip Cookie Dough Dip (Healthy)


My addiction to this dip is real. My lovely friend Maggie brought this to my house a while ago and everyone that ate it became obsessed with it. I am sure you are thinking okay it is a cookie dough what is the big deal..... BECAUSE it has no eggs, no flour.... and is healthy. I am sure you are like that sounds weird. Honestly, I ate like half the container before she told me it was healthy and then I was laughing about it. Anyway it is delicious and I want to make it all the time. Maggie served her's with vanilla wafers and I do the same. To make it even more healthy you can serve it with celery too. SHHH... Here is the secret recipe.

What you need~
1 can of rinsed and drained chickpeas (garbanzo beans)
1/4 cup maple syrup *If you want it more sweet at more
2 tsp vanilla extract
2 tbsp rolled oats
1/4 cup cashews
1/4 cup chocolate chips
Seasoning ( I used pumpkin pie spice)


Start by adding all ingredients (not the chocolate chips) to the food processor or blender. I blended mine for at least 2 minutes. I stopped the food processor and scrapped the sides down periodically. I layered the chocolate chips on the bottom of the dish and then scooped dip on top. Then I sprinkled the remainder of the chocolate chips on top of that. I like it chilled but you can serve it any temperature and it is outstanding.


Ready to blend.


Time to get creamy.


I love when it is almost done. That is when you get to taste it.


NOM NOM NOM.


I have had babies to picky adults love this recipe. You just have to try it. I promise it will become your new addiction. It is creamy and filling. PLUS with the chickpeas you get a ton of protein. It is also perfect for a potluck as it  can sit out!

Okay I will stop talking about it now. Just go make this amazingness.

Until next time~
XoXo Emily

Friday, July 21, 2017

Bath Renovation: Master Bath Finished


Done. Finished. Yes.

I was typing out the title to this post and it became real that we finally finished this huge project. There was literally blood, sweat and tears during this project. I thought the easiest way to do the before and after pictures was to break each section down below. I know this is a long post but I am really proud of our work so hang in there. You can always ignore my comments and look at all the pretty pictures too. I won't judge you either way. We are really happy with the outcome.

Shower-


Most people saw the post about this already so if you want to see more details on it click on there. This was the easiest part but most expensive part of the remodel. Would I hire again to do it? Yes. It was expensive but after doing everything else ourselves it was worth it.


~~~~~~~~~~~~~~~~~~~~~~~~~~~~~~~~~~~~~~~~~~~~~~~~~~~~~~~~~~~~~~~~~~~~~~~~~

Floor-


I wanted a gray/brown wood looking floor that would tie the shower into the rest of the room. We looked at a couple places and settled on this option from Menards. It is a bit thicker than other options but we really liked it and it seemed extra durable. One thing you learn really quickly when you strip a bathroom down is that people do strange things when trying to make things right. For us that meant the sub floor, a layer of linoleum and then another layer of subflooring. We worked around it. We also had to install subflooring where the old vanity was as they did not extend the floor out that far under it. That and putting in the t-strips was a little rough. T-strips if you an unaware are expensive and supposed to just "snap" in place. Yea.... Not in my house. Ryan did a good job installing the floor and I love it.


~~~~~~~~~~~~~~~~~~~~~~~~~~~~~~~~~~~~~~~~~~~~~~~~~~~~~~~~~~~~~~~~~~~~~~~~~

Trim-
This was bad. The old owners did a poor job of painting so the trim had a ton of paint on it. Not to mention years of scratches. The house was built in the 80's and needed some major updating. We bought pre-primed trim that I painted it all brown. Once installed I went back through with a tiny brush and touched up all the trim. This was time consuming but it really freshened the bathroom. I sadly did not think to take a pictures of the old crappy trim. Please enjoy some after pictures instead. We picked a chocolate brown color to paint the window trim, door trim, base boards and little dividing wall.


~~~~~~~~~~~~~~~~~~~~~~~~~~~~~~~~~~~~~~~~~~~~~~~~~~~~~~~~~~~~~~~~~~~~~~~

Toilet-


Our old toilet was fine. It was one of those energy savings ones we first put in when we bought the house. I just hated the button it had on top. It was not good looking. So, we decided to replace it easy right? WRONG. Turns out even the plumber we hired (who is an older gentlemen) had never seen such a stubborn toilet. We personally tried to install the new one (which I love) at least 4 times before we gave up and let him deal with it when he showed up to move the vanity plumbing. It is the effort that counts right? I love the new one it is more classic looking.


~~~~~~~~~~~~~~~~~~~~~~~~~~~~~~~~~~~~~~~~~~~~~~~~~~~~~~~~~~~~~~~~~~~
Cabinet-

We have a giant built in cabinet next to the toilet. I HATED it. It was all brown and dated looking with these giant weird handles in the middle of the doors. I could go on and on about it but originally I wanted to rip it out and replace it. The bones of it were actually really good and Ryan talked me into repainting it. I wanted to tie it together with the vanity so I painted to doors the same blue chalk paint that I painted the vanity. The rest of the cabinet was updated with the same hardware as the vanity and all white exterior. I have no idea why but I got extremely excited seeing this finished. It really made the room look so much better.

~~~~~~~~~~~~~~~~~~~~~~~~~~~~~~~~~~~~~~~~~~~~~~~~~~~~~~~~~~~~~~~~~~~~~

Light fixtures and power outlets-
We had cream gross outlets and we replaced them with white. You can see that in some of the pictures. Ryan also did some electrical work in this bathroom moving the light fixture. This bathroom was renovated for him to be able to use the vanity and not have to bend way over or have to have the light in his face. The light we had was really cool (we installed it when we moved in) so we used the same one and moved it up. Ryan did a great job doing this as it involved A LOT of work. I won't bore you with all the details but it had him cutting drywall, removing old fixture, watching youtube etc. It was time consuming but worth it for us tall people. If you look at this picture the light used to be where those mirrors are. Now it is way higher.


~~~~~~~~~~~~~~~~~~~~~~~~~~~~~~~~~~~~~~~~~~~~~~~~~~~~~~~~~~~~~~~~~~~~~~~~
Vanity-
Never again. I say that because this thing was a major labor of love. I ruined shirts making this thing and wore real cool masks in the process. Click HERE HERE HERE to read about my overall progress. 8 coats of tung oil, 2 coats of poly later the top was done. The rest of the vanity had 3 coats of blue chalk paint and 2 coats of poly. The top was made by my father-in-law and really after all the stress it looks amazing. This thing involved at least 40 hours of work. When it is all said and done I have a gorgeous piece of art in my bathroom. Here are like a bunch of pictures of it so enjoy!


In closing. I love this bathroom. It sucked up 2 months of my life though. When people would ask me what I was doing I am sure they were not pleased when I talked about toilet flanges for 20 minutes. So I am sorry friends and family thanks for hanging in there during this long process. Sadly home ownership involves constant projects and we already started with our next last week before this one was finished. Onto the retaining wall project!
 
Until next time~
XoXo Emily

Wednesday, July 19, 2017

HEALTHY Mac & Cheese


O.M.G. I cannot believe something this simple is so delicious. Most of the time when someone tells you to try a healthy recipe you want to laugh in their face because let's be real mac & cheese is not something that you think of as healthy. One of my best friends Liz made this for her son Sawyer who is a baby and if he loved it I knew I had to try it. I mean there still is cheese, milk and butter but what really makes the difference is there is less of these things. This is due to the magical veggie you add to the sauce..... butternut squash. I have never in my life cooked this squash but it was easy to do and let me tell you this is going into normal recipe rotation at our house. I had enough from this recipe to make 4 full bowls of the mac & cheese for Ryan and I. We did not eat all that but we do have some tasty leftovers for lunches.

What you need~
2 cups pasta (I used elbow)
1 cup milk (I used almond)
1 cup cheese (I used mild cheddar)
1 butternut squash (medium in size)
1 tablespoon of butter
Mrs. Dash (or seasoning) to taste


Start by pre-heating oven to 400 degrees F. Cut your squash in half and brush with olive oil. Roast until fork tender. I cooked mine for an hour due to the size. Make your pasta while the squash roasts. Remove squash from oven and peel off the skin. Place the squash in a blender. Add the milk, butter, cheese and seasoning to the blender. Blend until you get everything smooth. Pour the sauce over the cooked pasta. You do not need all the sauce you will have some left over. This is good for when you reheat the pasta you can add a little of the extra sauce to make the pasta creamy again.


In the blender and ready to blend.

Make sure it is smooth.

Pour all that yumminess over the pasta.

So creamy!

I mean look at it. Perfection.

I bet you will eat an entire bowl.
This was the best mac & cheese I have personally ever made at home. I was happy I did not have to make a flour paste or anything like normal mac & cheese. PLUS this has a ton of healthy things in it with the squash. I topped ours with chicken. You can top it with bacon too if you wanted.

Until next time~
XoXo Emily